For this project my group and I worked on a simple flashlight. We had the task of taking it apart and exploring all the elements involved to make it work and what puts it together. Our main challenge was figuring out how an LED works and the material of the outer shell of the flashlight. In order to do all these steps we first had to take the flashlight apart. Once we explored the inside of the flashlight, all the elements of the flashlight were clear to us. These are some of the steps we had to take:
- Sketch the flashlight put together
- identify all outside parts of the flashlight
- take apart the flashlight
- identify and sketch all inside parts of the flashlight
- identify the function of each component
-research how each component works and the science behind it
- make a detailed slideshow explaining our process
This is a video we used in our slideshow of how batteries work. - https://youtu.be/9OVtk6G2TnQ
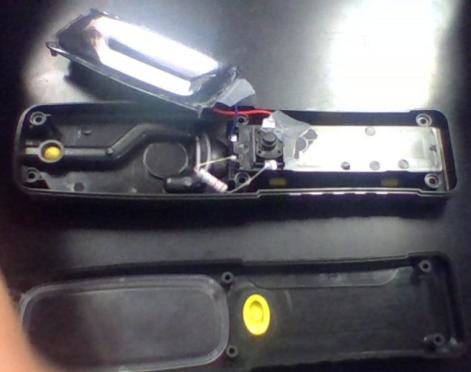
Above is an image of the flashlight taken apart
This is the URL to our final presentation: https://docs.google.com/presentation/d/1X_So84KmufDTMtOAP4vRkXOWBK_DdXYsT7Ay1hYmYKM/edit#slide=id.p
So in this project we discussed how LED's, Batteries, and resistors work. First we discussed how an LED works. An LED is a light emitting diode, it is made of aluminum-gallium-arsenide. This material can be "doped" to have extra atoms that are called N-type or P-type. When they switch from N to P-type they drop to a lower orbital level and release energy in the form of photons. LED's output a higher lumen count with less energy used which makes them more efficient.
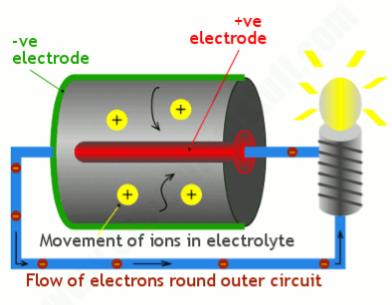
A battery converts chemical energy into electric energy. Positive and negative ions are created. Positive ions flow into electrolyte. Negative ions flow on the outside circuit and completing this circuit creates light in a bulb.